Baked Duck Eggs in Portobello Caps (SRC)

Have you ever eaten duck eggs? Wow, they have quickly become my new food love. I stumbled across some at our farmer’s markets as well as a local health food store and it’s been a game changer for me. After some allergy testing and an elimination diet, I discovered that I react to chicken egg whites and despite being briefly bummed, I sought out alternatives and experimented with egg-free versions of my favorite recipes. After duck eggs were discovered, my foodie world expanded once again.

Here are a few highlights of the beloved duck egg and why you might want to get your hands (and forks) on some if possible:

1. The yolk of a duck egg is much larger than one of a chicken egg – yum!
2. Duck egg shells are harder to get a clean crack and are much tougher than chicken eggs, creating a longer shelf life.
2. Nutritionally speaking, they have a higher fat content (good fat!), higher in protein than chicken eggs and contain more vitamins and minerals (such as iron, B12, folate) and Omega-3 fatty acids
4. Just take care not to overcook the whites of duck eggs, they contain more protein and therefore can become more rubbery if cooked too long.
5. The yolks have a richer, almost buttery flavor, most likely attributed to the higher fat content.
6. Duck eggs contain more albumen, which gives them more structure, thus creating a very light, fluffy, and rich baked good with a higher lift than those made with chicken eggs.
poached egg close2I’ve been searching for more breakfast options and was itching to try out my new duck eggs in a recipe…so when I spotted Amy’s recipe for Baked Eggs in Portobello Mushroom Caps, I was sold. This recipe was lightly adapted from Amy’s Savory Moments blog that I was assigned to this month for the Secret Recipe Club reveal! I swapped out the chicken eggs for ducks eggs, used green bell pepper instead of the grilled piquillo and served the dish with sliced avocado and fresh basil for a bit of freshness. I left out the cheese for allergy purposes but but I sure that would a lovely addition if you can eat it. In short, I loved this recipe! Not only does it provide a hearty serving of veggies to start the day, it’s flavorful, simple ingredient and adaptable!
I was excited to learn more about Amy, and her passion really resonates with me. She started blogging to document her “…growth and progress over time to better cooking and healthier eating …and encourage others to eat local, eat healthy, eat seasonally when possible, but also to enjoy food, cooking, and food culture.” YES! This speaks to my heart 100% so Amy and I share the same enthusiasm around food. Her Rhubarb BarsBrazilian Shrimp Stew, and Currant and Lemon Cornmeal Pancakes also had me drooling as I bookmarked these beauties for future experimentation 🙂 Thanks for the delicious recipes! poached egg

Baked Eggs in Portobello Caps (adapted from Savory Moments recipe)
2 large portobello mushroom caps
2 duck eggs or 2 large chicken eggs
1 clove garlic, minced
2 Tbsp small diced onion
large handful of mixed greens or baby spinach (roughly 1 cup)
1/2 green bell pepper, small diced
about 1/3 cup grated sharp cheddar cheese or favorite non-dairy cheese (optional, I omitted)
pink Himalayan sea salt and fresh ground black pepper to taste
paprika for garnishing
fresh avocado slices or guacamole for serving, optional
chopped fresh basil (or cilantro or parsley) for serving, optional
favorite fat or oil for cooking (coconut oil, olive oil or avocado oil)

Directions

  1. Pre-heat your oven to 375 degrees and drizzle a bit of olive oil/fat in small baking dish. Wipe the dirt off your mushroom caps with a damp towel. Gently scrape the gills out from the underside of the mushrooms with a spoon. Place in the baking pan and drizzle a small amount of fat/oil on the mushrooms and a bit of black pepper. Bake for about 10 minutes, until the begin to get soft and shrink up a little.
  2. While mushrooms are baking, heat some fat/oil in a small pan and saute the garlic, green pepper and onions for about 2-3 minutes. Then add the spinach and cook until it’s wilted. Add some salt and pepper. Set aside.
  3. Remove mushrooms from the oven and lower oven temp to 325F.
  4.  Discard all juice inside mushroom caps and wipe out all juice out of the baking dish. Take a towel and gently press the inside of the mushrooms to get out any excess juice. Place the mushrooms (bottom/cup facing up) back into the baking dish. Put half of the spinach mixture into each mushroom, and sprinkle with cheese if using. Try to leave a “hole” in the center so there is room for the egg yolk.
  5. Carefully crack an egg on top of each mushroom. Sprinkle with some salt, pepper, paprika, and some extra cheese. Carefully place the baking dish back into the oven and bake for another 8-10 minutes, until the whites of the eggs are cooked and the yolk is set. Garnish with paprika and serve with avocado slices and fresh basil or favorite herbs (optional).

poached egg close1

For more recipes from this month’s reveal, click the link below!

Black Bean, Winter Squash and Greens Quesadilla (SRC)

Handheld eats are always a win in my book…they are versatile, they are portable and they are so satisfying! Whether it’s a wrap or a sandwich or a taco, you can pack all the food groups into one lovely bite. This veggie-friendly quesadilla is no exception! black bean squash and greens quesadilla 1

I was assigned Terri’s blog Our Good Life for this month’s Secret Recipe Club reveal, and I enjoyed perusing through her posts of recipes to crafts and family . I wound up picking her Acorn, Black Bean and Spinach Quesadilla this month for two reasons: I had my mind set on Mexican food and I couldn’t wait to test out a quesadilla using Against the Grain’s new gluten-free pita bread (which doubles fabulously as a tortilla). Terri’s Radish Leaf Pesto will be perfect to whip up this spring, her Oat Congee with Fried Egg and Scallions definitely peaked my interest, and her Apple Cinnamon Roll Bread Pudding has been bookmarked for the next stormy day when I’m craving comfort food!

Even though Spring is here (or almost here in Montana), I am still enjoying my fair share of sweet potatoes and winter squash. They are a staple in my kitchen and you can always find an uncooked kabocha squash or Japanese sweet potato on the counter ready to be incorporated enemy next recipe experiment! This recipe for a winter squash quesadilla was a huge hit and without a doubt satisfied my hankering for Mexican food!

black bean squash and greens quesadilla

Now this is an ideal flavor combo for me! The creamy texture of the winter squash and the velvety beans complimented the crisp edges on the tortilla and the salty, stringy melted cheese. The sautĂ©ed greens added a nice earthy dimension to the dish along with the brightness from the cilantro and fresh squeezed lime juice. I changed up a few things on this recipe based on what I had on hand — I substituted kabocha squash for the acorn squash, I used a gluten-free, grain-free tortilla and I added a bit of cilantro for a bit of brightness. I decided to smash up some of the black beans to help adhere the ingredients together since I stuffed the tortilla with the layers of filling 🙂  Mmmmmm!
black bean squash and greens quesadilla close

Black Bean, Squash and Greens Quesadilla (recipe adapted from Our Good Life)
Gluten-free, Grain-free, Dairy-free Option, Vegetarian, Vegan Option, Nut-free, Sugar-free, Soy-free, Egg-free

Ingredients

  • 1 c small dice cooked acorn squash, kabocha squash or butternut squash
  • 2 T olive oil
  • 2 cloves minced garlic
  • 1 tsp cumin, ground
  • 1/4 tsp cayenne
  • 1 can organic black beans, rinsed
  • 1 small bunch spinach (or your favorite leafy greens), destemmed and chopped
  • 4 gluten-free flour tortillas (I used grain-free Against the Grain pita bread)
  • 6 oz monterey jack cheese or your favorite dairy-free shredded cheese
  • 2 Tbsp chopped cilantro OR 3 Tbsp chopped greens onions

For serving 

  • lime wedges
  • your favorite salsa and/or guacamole
Instructions
1. Line a cookie sheet with nonstick foil or parchment. Preheat oven to broil.
2. Heat the olive oil and garlic in skillet over medium heat. Add spices and stir for 30 seconds.
3. Add the beans and 3 T water until hot. Mash them with a back of a large spoon if you prefer more a refried bean-ish result, then add chopped spinach or greens. Cook for about one minute, or until spinach wilts.
4. Place the tortillas on the cookie sheet. Place 1/4 c acorn squash, 1/4 of the bean mixture, and cheese. Remove from oven, sprinkle with fresh cilantro and fold over the tortilla to cover the filling.
5. Broil until the top is golden brown, about two minutes. Serve with salsa and/or guacamole and a squeeze of fresh lime.
Serves 4

black bean squash and greens quesadilla 2

For other recipes in this month’s reveal, click the link below!


Crockpot Shredded Chicken with Apple Cider Vinegar BBQ Sauce – 4 Ways (SRC)

Slow cooker meals are a lifesaver after a long day of work. I get home, I’m hungry and I’d prefer not to spend a couple hours in the kitchen. I’d rather heat up or whip up something quick to eat and be able to enjoy “free time” outside of work in the evenings. While cooking is certainly a passion, it can seem more like a chore at the end of a busy day.

When I find a recipe that can be used as a base for multiple meals, it’s a definite winner. This slow cooker pulled chicken is just that. I served this dish as a filling snack over a half of an avocado, over a bowl of cooked grains and lentils with green onions, as an add-in to a smoky veggie soup and as the main dish with some cabbage slaw and pickled onions. You can also serve this in a wrap, over a salad, in a panini, as a pizza topping or as a topping to a baked potato or yam. Can you say endless possibilities?
shredded bbq chicken 4waysLet’s not forget the BBQ sauce — Apple cider vinegar is such a versatile ingredient and I love love LOVE the taste! It’s bold and tangy, and adds a lovely zip to dishes from soups and salad dressings to marinades and main dishes. While lemon and lime juice have their places, apple cider vinegar has a place in my heart all it’s own. Naturally, when I came across Lauren’s recipe for a
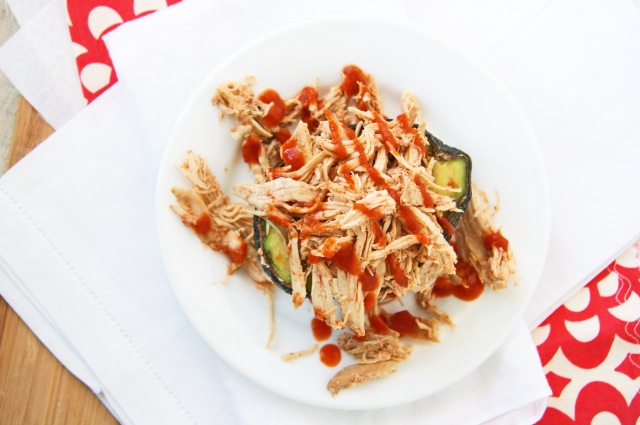
 Slow Cooker Pulled Chicken and Homemade Apple Cider Vinegar BBQ sauce, I knew I had to make it.

shredded bbq chicken avocadoThis month’s Secret Recipe Club assignment was Lauren’s delicious and crafty blog Sew You Think You Can Cook. I knew Lauren was a great match when I came across fun flavor combos such as her Hummus Waffles with Sausage and Sun-Dried Tomatoes, Sweet Potato and Chorizo Hand Pies, Coconut Shrimp with Bloody Mary Dip  and Parsnip and Blueberry Baked Oatmeal.  While I chose her Pulled Chicken and Apple Cider BBQ Sauce, with my newfound love for parsnips, you can be sure Lauren’s baked oatmeal will be made in the next week or so!
shredded bbq chicken rice pilaf

I made a few changes to Lauren’s recipe based on what I had on hand. I had a combo or chicken breasts and boneless, skinless chicken thighs and I really loved the flavor that the richer thigh meat lent to this dish. I swapped out the sweetener for maple sugar and used smoked salt instead of regular sea salt. I made a special grocery store run to buy gluten-free beer…I didn’t want to swap that out so I could stay true to the recipe, though now I have several bottles of beer to experiment in other recipes 🙂 Thanks Lauren for this recipe, I’ll be making this again!
shredded bbq chicken slaw

Slow Cooker Pulled Chicken (recipe adapted from Sew You Think You Can Cook)
Gluten-free, Grain-free, Paleo-friendly, Soy-free, Refined Sugar-free, Dairy-free, Egg-free, Nut-free

Ingredients

4 large boneless, skinless chicken breasts or 8 boneless, skinless chicken thighs or a combo (I used 2 chicken breasts, 4 chicken thighs)
1 1/2 tbsp paprika
1 tbsp garlic powder
2 tsp granulated sweetener (maple sugar, sucanat, coconut sugar)
1 1/2 tsp ground mustard powder
1 tsp cayenne (can reduce if you are sensitive to spicy food)
1 bottle or can (12 oz) gluten-free beer
sea salt and pepper to taste (I used smoked salt)

Directions
1. Season chicken with salt and pepper generously. Place in the bottom of a slow cooker.
2. In a small bowl combine paprika, garlic powder, sweetener, mustard powder, and cayenne. Sprinkle over the chicken.
3. Pour beer into the slow cooker. Cook on LOW 5-7 hours until the chicken shreds easily.
4. Serve as a sandwich, wrap, over grains, over avocado, as a pizza topping, on top of a salad and drizzle withe apple cider vinegar BBQ sauce (recipe below).

Apple Cider Vinegar BBQ Sauce (recipe adapted from Sew You Think You Can Cook)
Gluten-free, Grain-free, Paleo-friendly, Soy-free, Vegan, Vegetarian, Dairy-free, Egg-free, Nut-free

Ingredients
1 1/2 C apple cider vinegar
1 clove garlic, smashed
1 Fresno chili pepper, deseeded and halved
2 tbsp sweetener (coconut sugar, maple sugar, honey, agave, maple syrup)
2 tbsp tomato paste
1 tbsp Dijon mustard

Directions
1. Place all ingredients in a saucepan. Bring to a boil over medium high heat then reduce to a simmer. Cook 20 – 30 minutes, or until a desired consistency is achieved. Remove the garlic and chili pepper, if used.

shredded bbq chicken veggie soupFor other recipes from this month’s reveal, click the link below!

Smokey Scramble Skillet Bowl

Some nights after work I really don’t feel like cooking….ordering take out or walking over to the hot bar at the health food store sounds much more appealing after a long day. Then I think, wait…I could have this dinner on the table in about 20 minutes…and that’s faster (and healthier) than takeout!

all about the green scramble bowl closeThis quick and adaptable scramble bowl is packed with protein, fresh veggies and healthy fats with an option to substitute your favorite vegetable or side. It makes for a hearty breakfast, tasty brunch or a well-rounded dinner with a breakfast flare…and I’m a huge fan of breakfast for dinner 🙂 It may not look like much but this bowl is TASTY!

all about the green scramble bowl

For extra fluffy eggs, I add a splash of water along with salt, pepper and seasoning along with the egg in my Magic Bullet or Vitamix…talk about a light texture! My mom used to add half n half or milk to our scrambles when I was growing up, but water works well for a dairy-free option.  Plus, the water helps steam the eggs a bit and prevent them from drying out quickly 🙂 Feel free to add your favorite veg or meat, but don’t skip the smoked salt and oil if you don’t have to – it takes the dish to the next level! 
all about the green scramble bowl2

Smokey Scramble Skillet Bowl 
Gluten-free, Grain-free Option, Soy-free, Paleo-friendly, Soy-free, Vegetarian, Nut-free, Dairy-free, Nightshade-free, Easy, Sugar-free

Ingredients

1 Tbsp smoked oil (I used peppered bacon flavored olive oil) or coconut oil (this won’t have as much i
1 1/2 Tbsp water* (optional but makes the eggs light and fluffy)
4 cage-free, organic eggs
pinch of dried thyme or rosemary, optional
large pinch of smoked salt
freshly ground black pepper
1 garlic clove, minced (can omit or use garlic powder if desired)
1/2 cup sweet yellow onion, chopped (red or white works too)
1 cup sliced mushrooms (chopped asparagus, zucchini or broccoli can be added or substituted)
big handful or leafy greens, rough chopped (~2-3 cups; I used swiss chard and baby spinach
1/2 avocado, pit removed & chopped or sliced

For serving:
1 1/2 cup cooked grain of choice or roasted sweet potato cubes or hashbrowns (for Paleo/Grain-free), warmed
chopped cooked bacon or crumbled breakfast sausage (option, not pictured but can be added if preferred),warmed
chopped chives and/or fresh parsley
more smoked salt and pepper to taste
drizzle of coconut aminos or hot sauce (not nightshade free), optional

Directions

  1. In a blender*, add eggs, water, salt, pepper and herbs (if using). Blend for 5-10 seconds and side aside.
  2. In a skillet, heat 1 1/2 teaspoons of oil in a skillet over medium-high. Add onion and saute for 3-4 minutes, stirring occasionally until onions start to turn translucent and soften.
  3. Add mushrooms and cook for 2 minutes, then add the greens and cook until wilted, roughly 1-2 minutes. Remove veggies from pan, cover and set aside to keep warm.
  4. Heat remaining 1 1/2 teaspoons of oil in skillet. Add eggs and let cook for 5 minutes until set and cooked through, stirring occasionally to prevent burning or overcooking. Stir in veggies and chopped avocado, then toss to combine.
  5. To serve, layer the bowls with grain or potato of choice, meat (if using), veggie and egg mixture and sprinkle with fresh herbs. Season with additional smoked salt and pepper to taste. Drizzle with coconut aminos or hot sauce if desired and enjoy warm!

Serves 2

*If you don’t have a blender, you can whisk the eggs, water and seasoning well by hand; I prefer the blender for quicker prep and the texture it yields.
If you can have nightshades, smoked paprika would be a really flavorful addition too!

all about the green scramble bowl3